4.1 - Getting started with the Plan Configurator
Getting started with the Plan Configurator
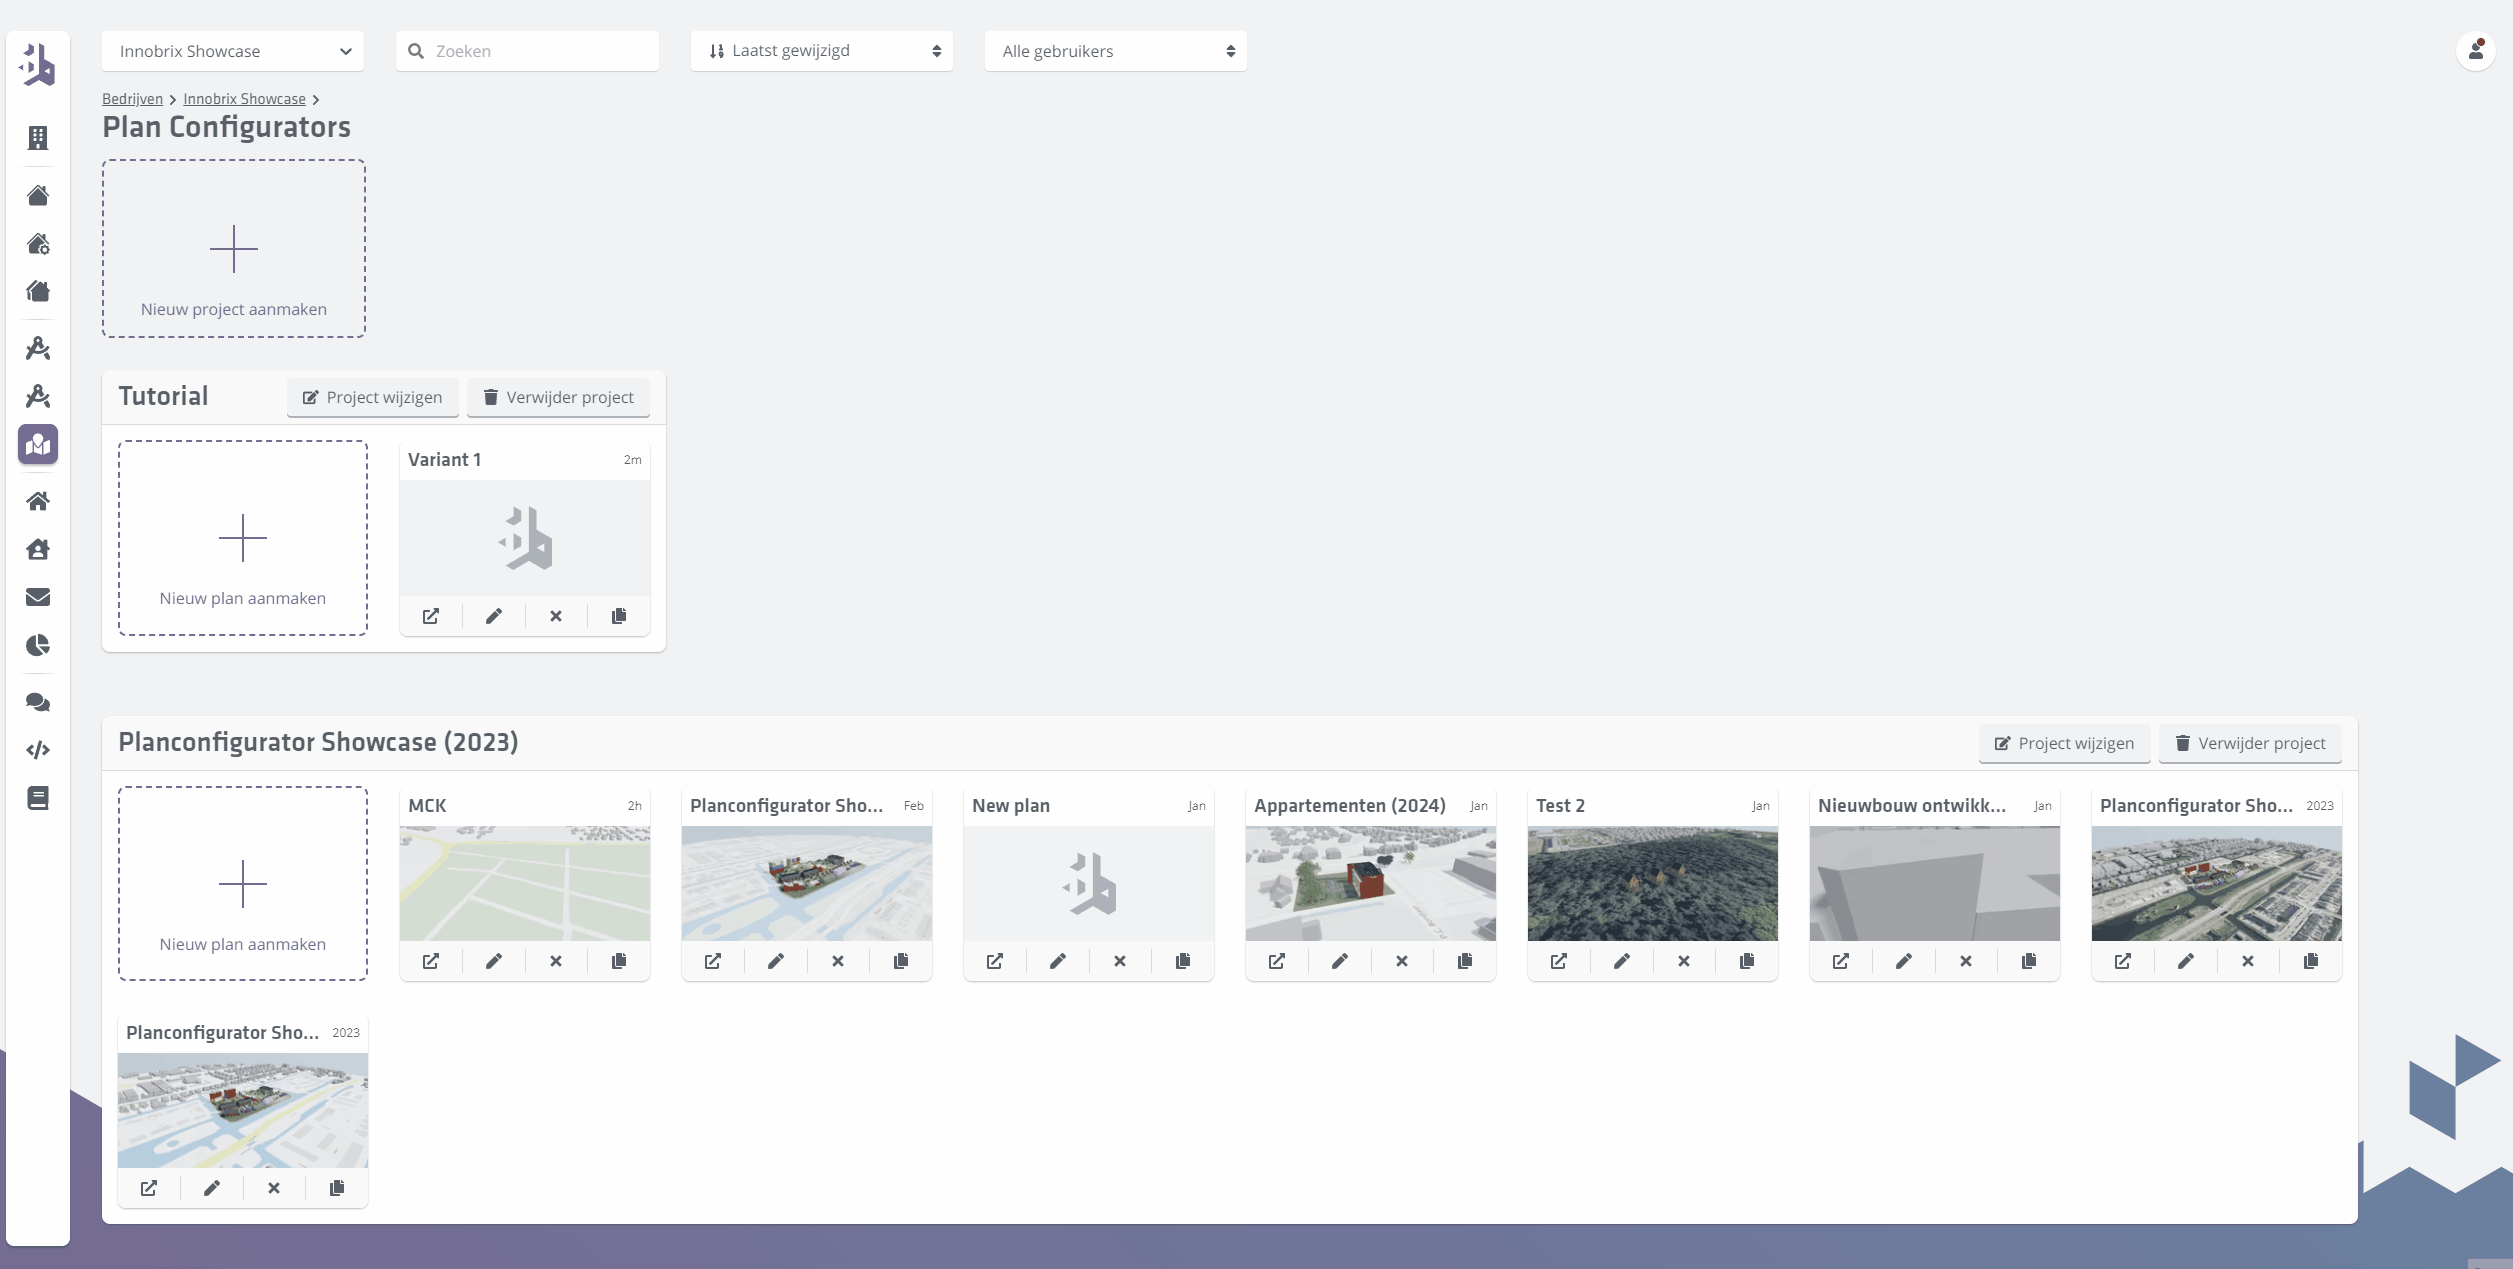
The Innobrix Plan Configurator is on the Plan Configurators page in Innobrix Studio. This is where all Plan Configurator projects are created.
The Plan Configurator can be filled with content in the form of Models (models without options), Configurables (models with options), and has access to a wide set of Mass Volumes.
You can also use Home Types: full Homes already equipped with the right Home properties and any options. Home Types always come from Models and Configurables.
You can create multiple Plans inside a Plan Configurator project.
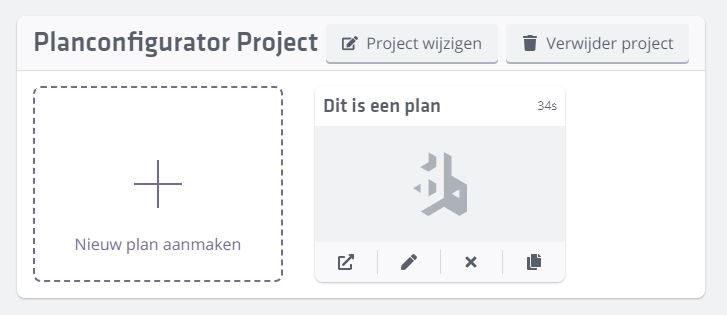
Create a Plan Configurator project
Create a new Plan Configurator project by clicking the big + Create new project button. When creating a new project you have
a series of properties you can adjust. For example, you can hide all prices if you wish (under Other).
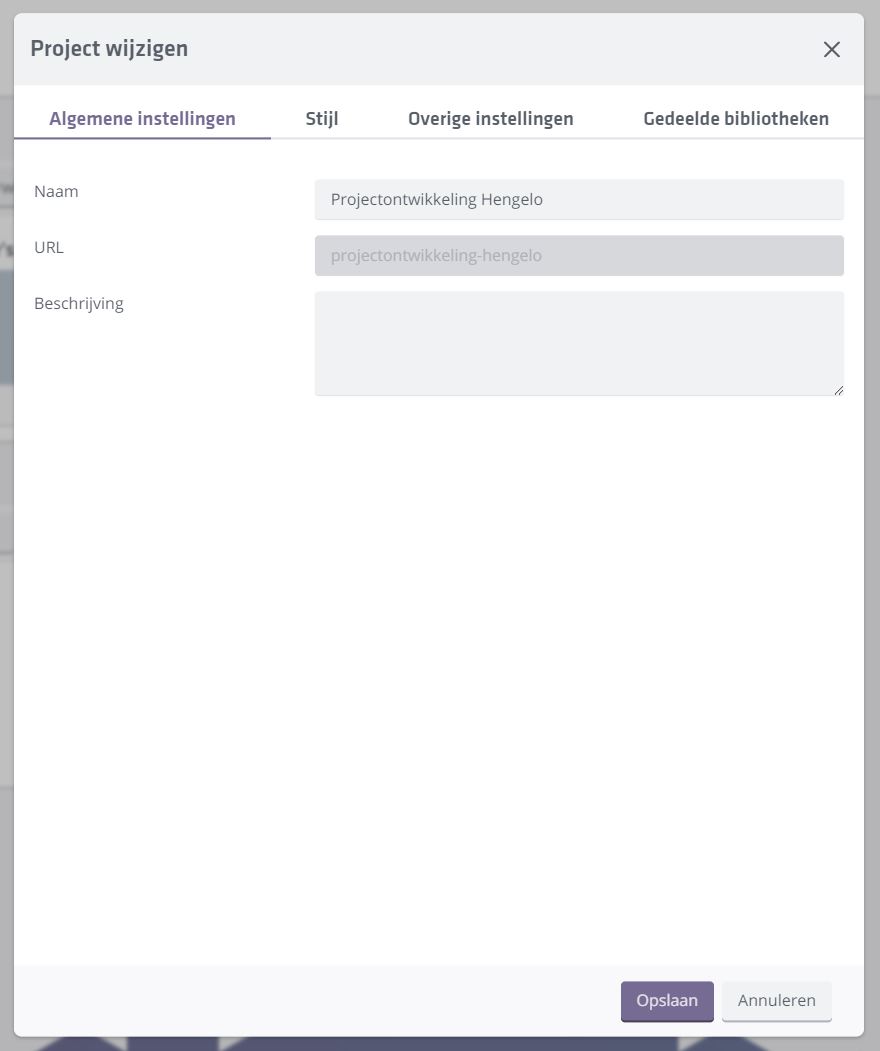
If you receive models from another Innobrix user you can enable them in your project under Shared libraries.
-
Click
+ Create new projectand name it "Tutorial". -
Click
Save.
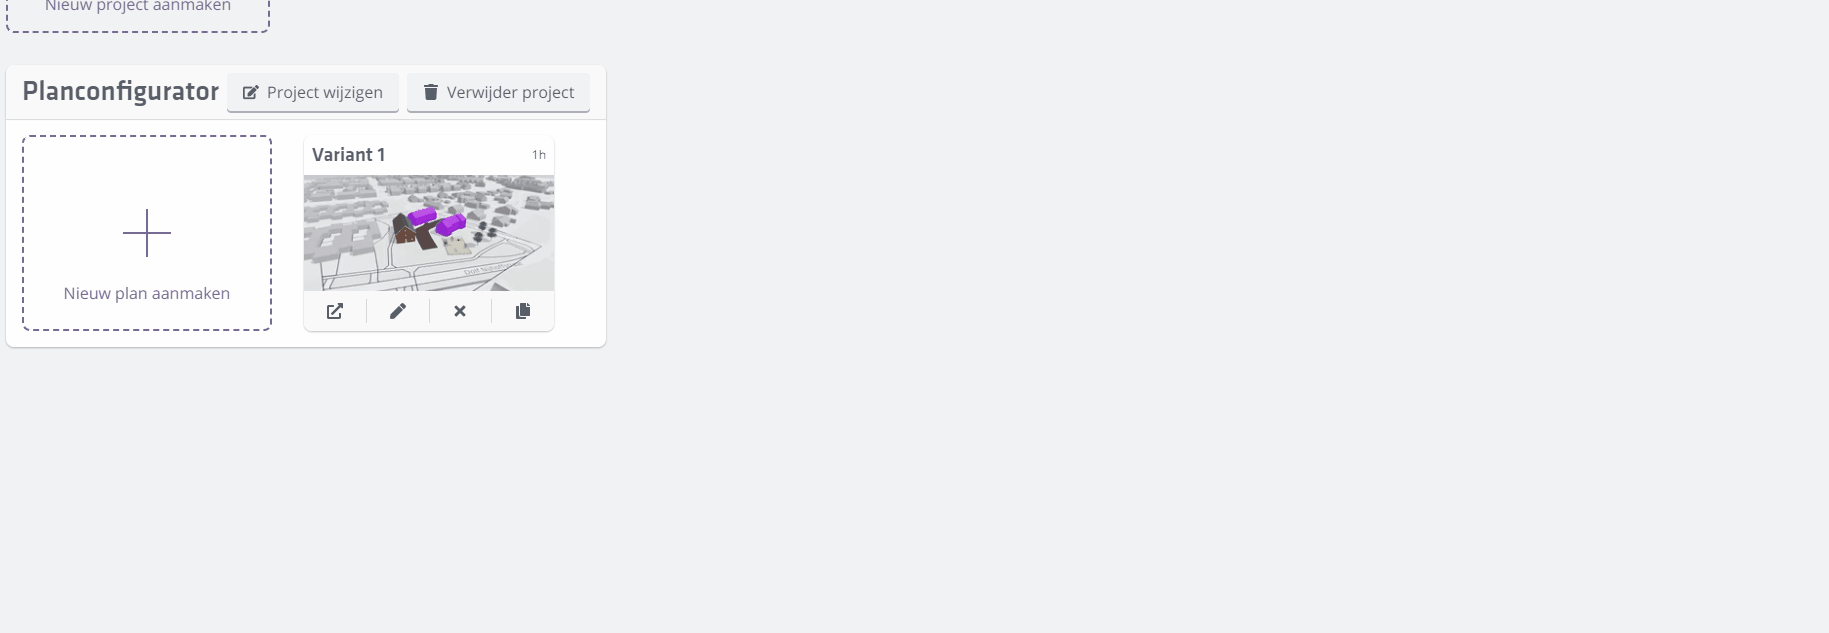
Once the project is created you can add plans to it.
Click + Create new plan and name the new plan Variant 1. Optionally add a description for yourself.
Click Save.
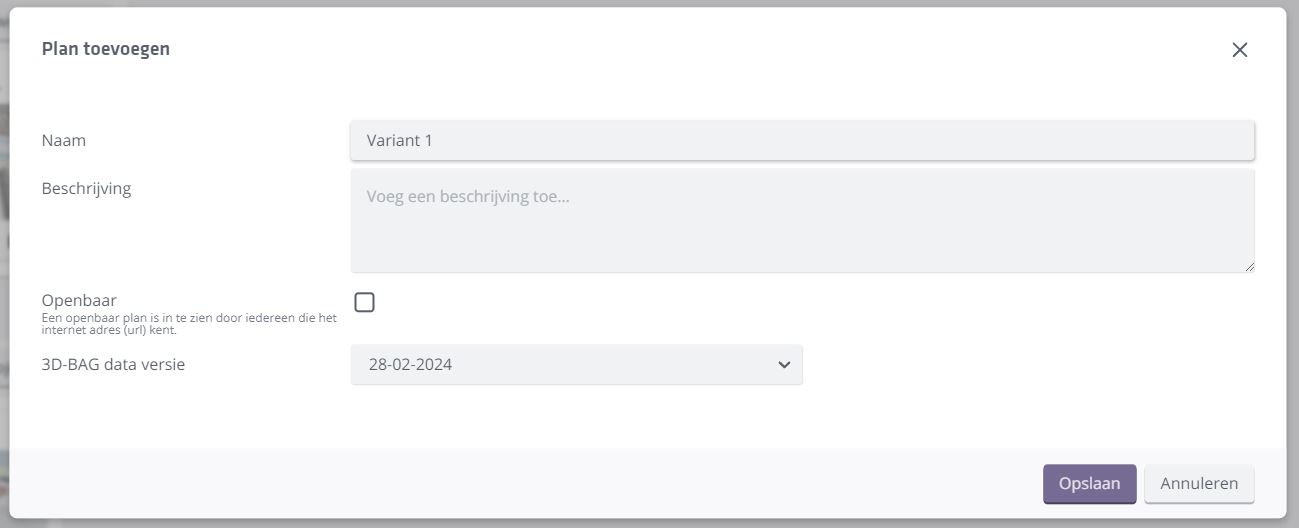
The Public toggle means any anonymous user who knows the plan URL can access it. If Public is off, only people with an Innobrix account linked to your company (and the URL) can access it.
Enter the Plan Editor by clicking the image on the newly created card.
The Plan Configurator works step by step; you just completed step 1.
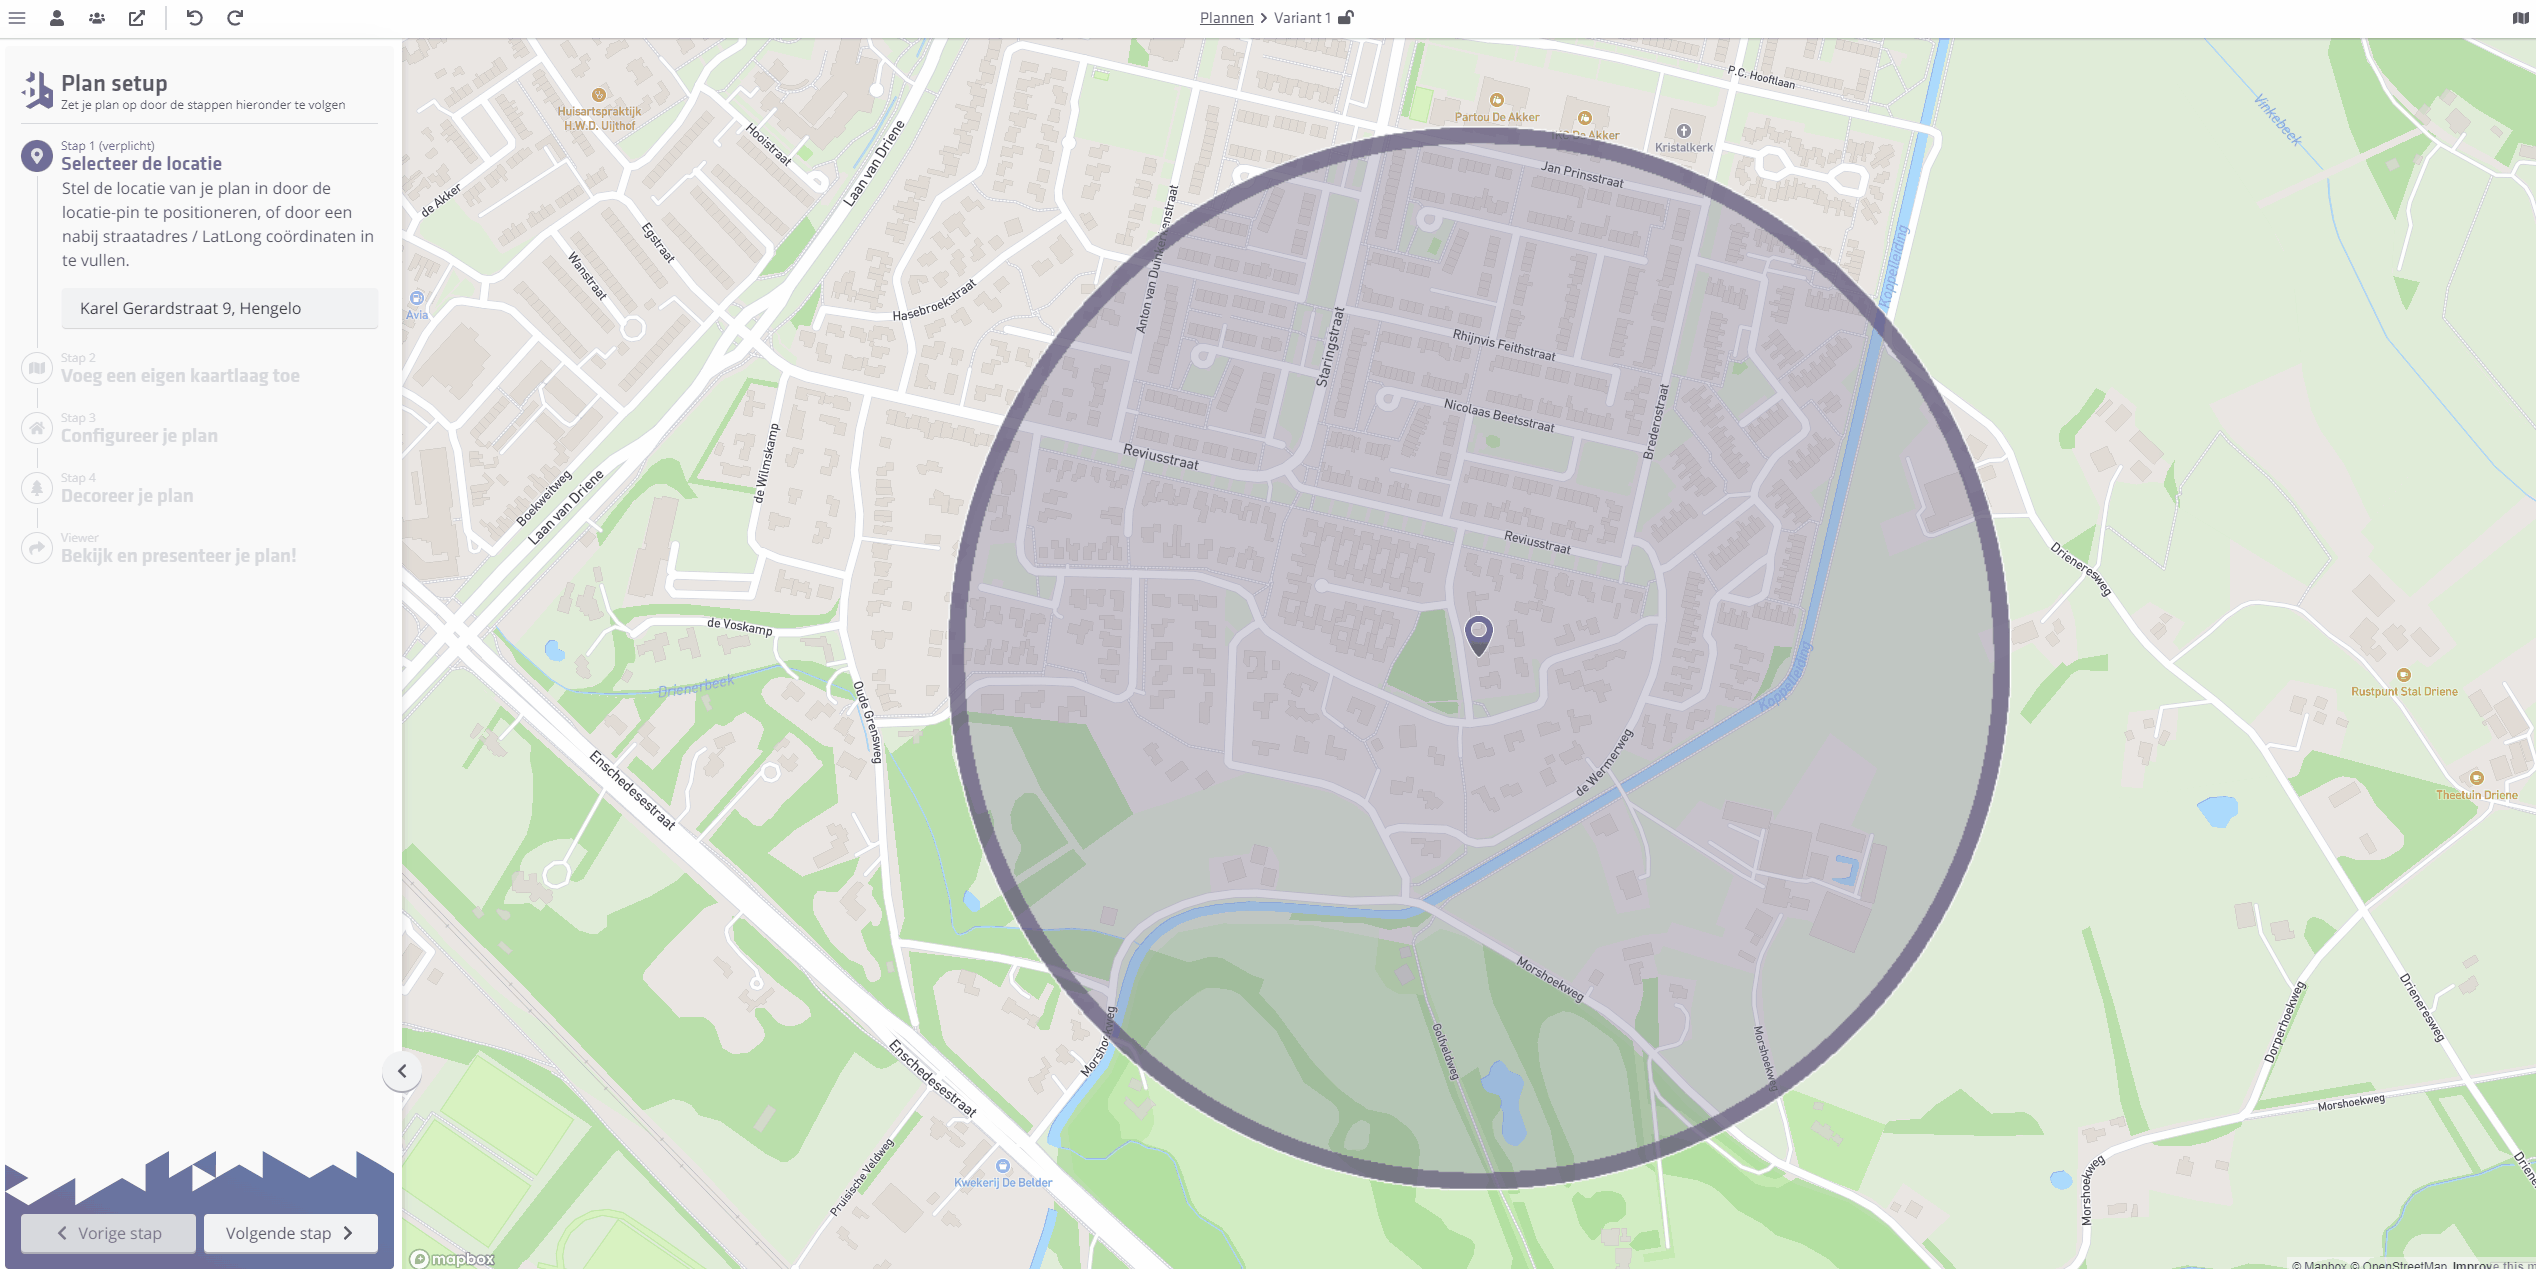
Step 1 / Select the plan location
The first step is picking the location where the plan will be developed. Enter a location in the Search location... field. You can also drag the purple pin.
-
Enter the address "Karel Gerardstraat 9, Hengelo" in the
Search location...field and press ENTER. -
Click
Next step >.
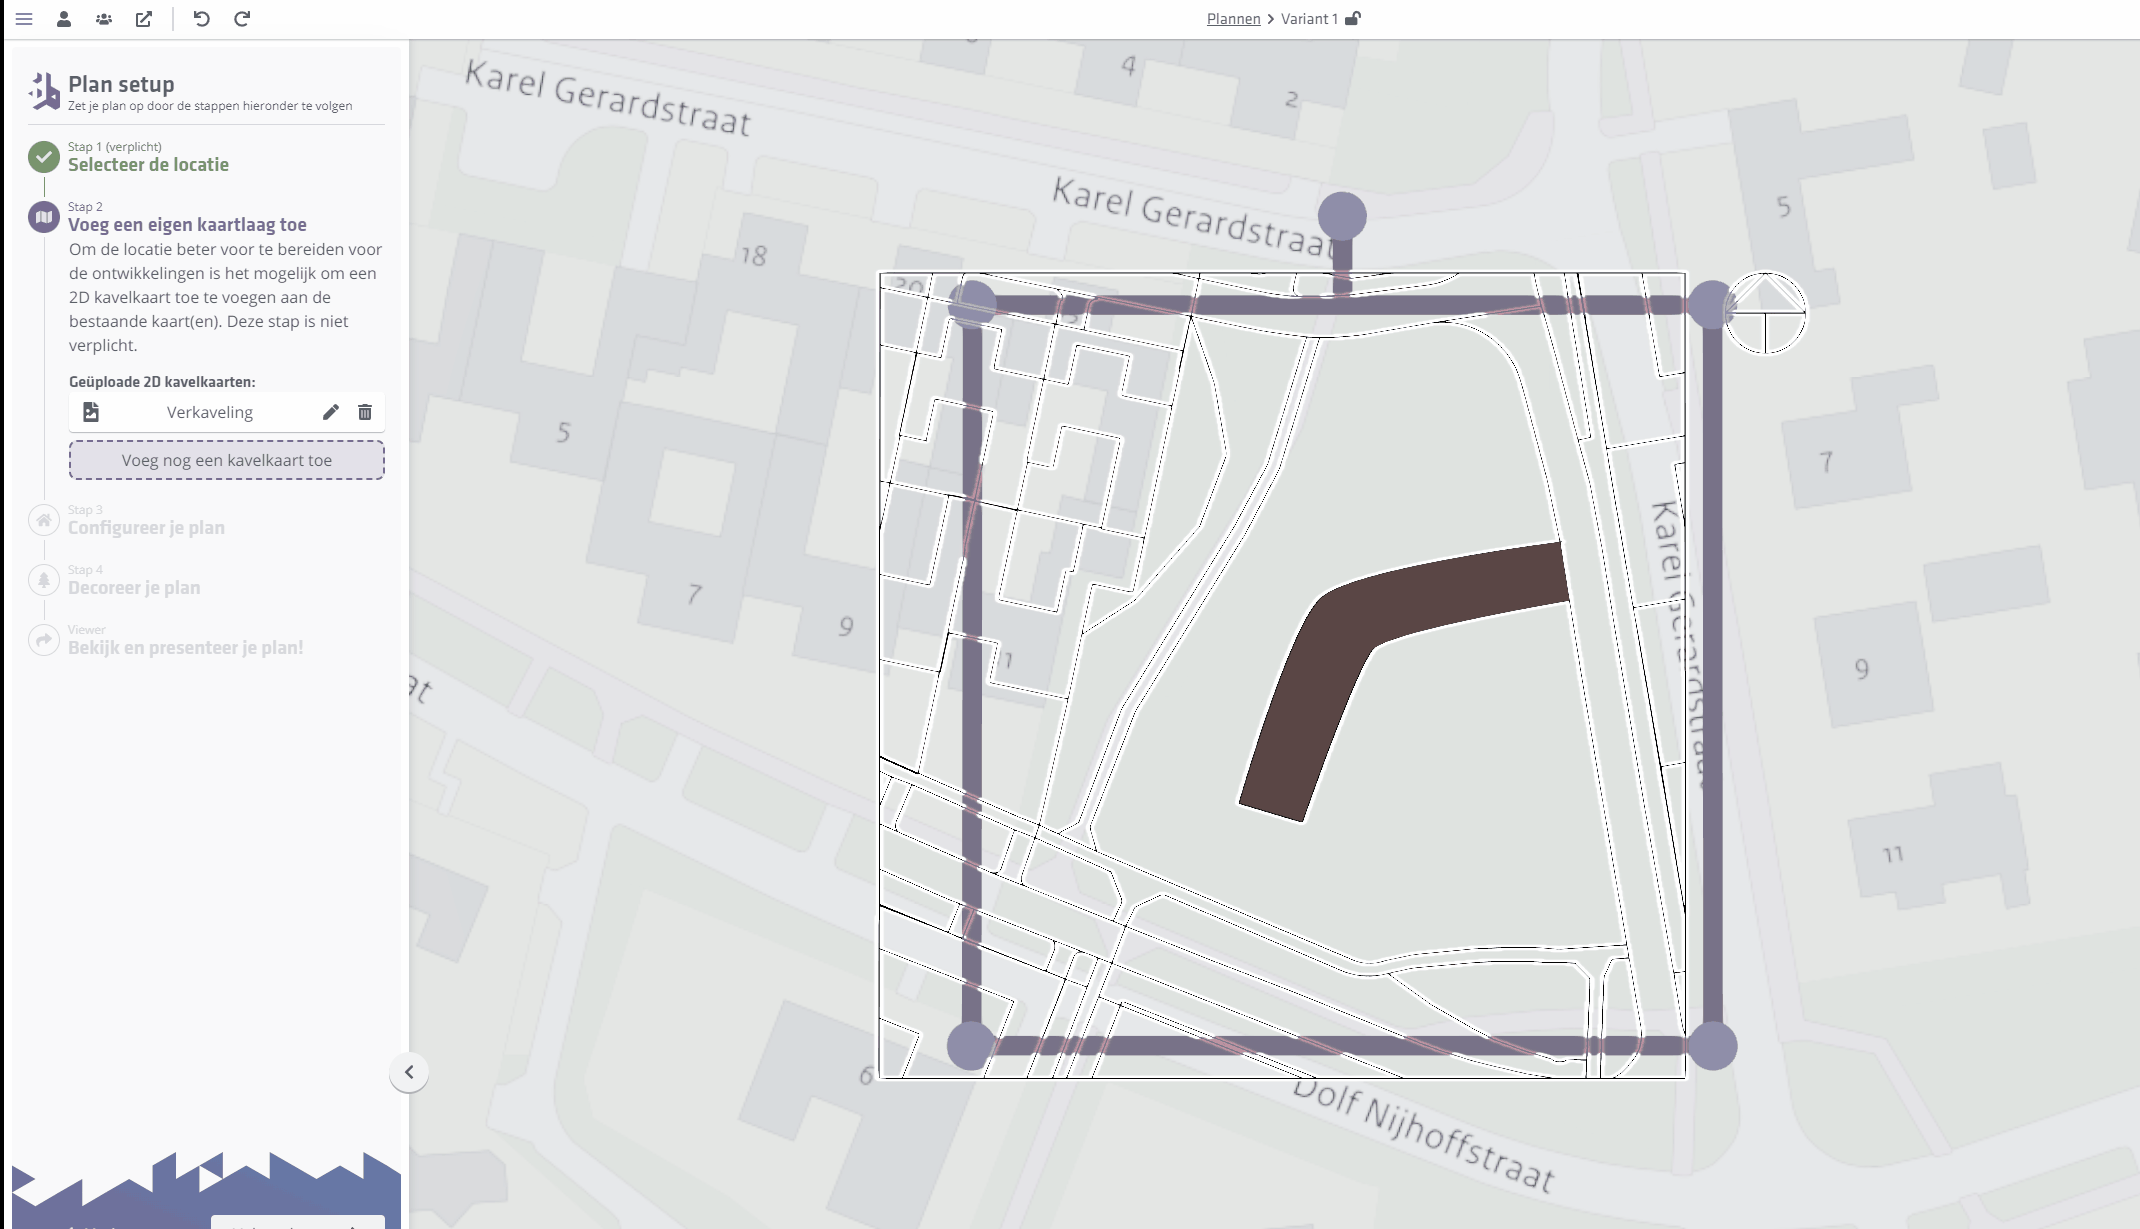
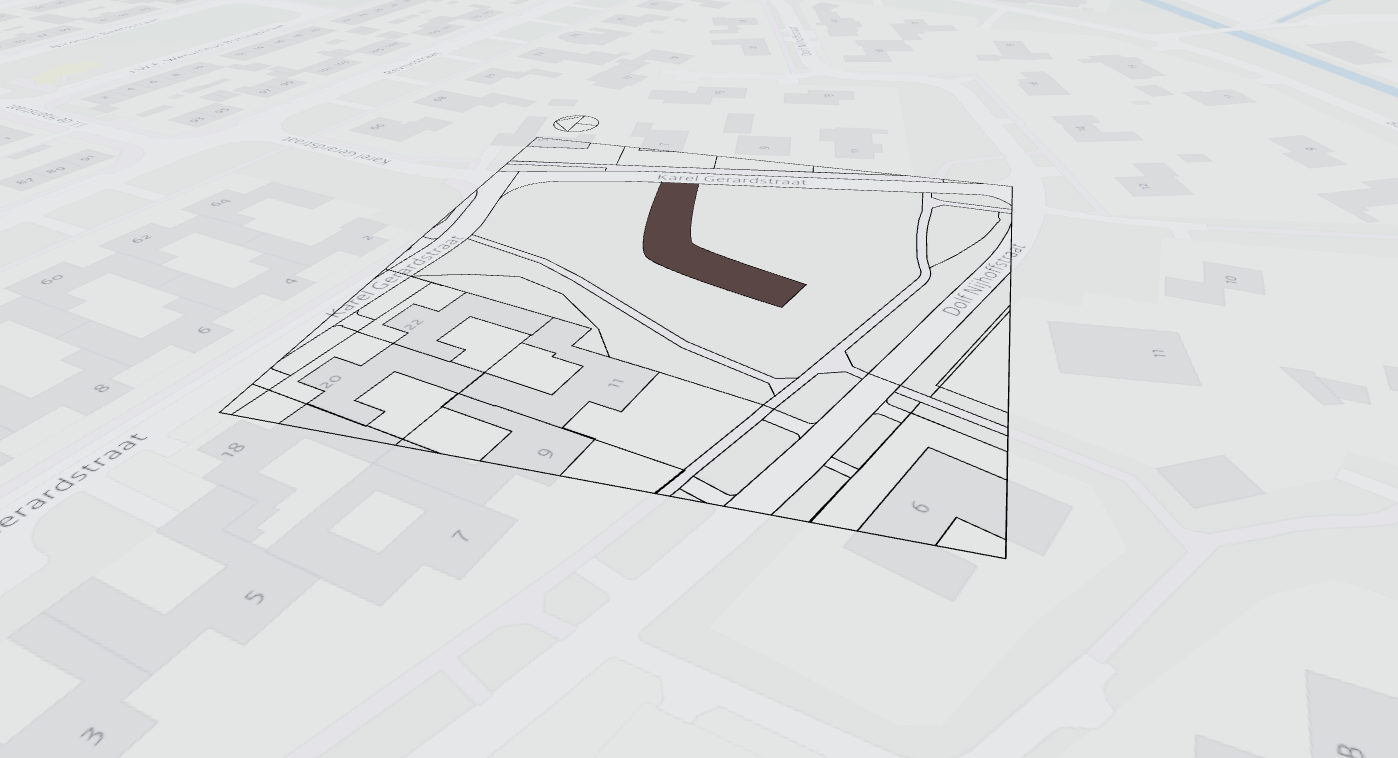
Step 2 / Add your own map layer
In the second (optional) step you can import your own map layer as an image or simple vector file. Supported formats are .jpg, .jpeg, .png, or .svg (SVG is vector).
Use the image below to overlay the chosen location. Right-click RMB the image and save it to your computer.
 .
.Position and scale the downloaded SVG by dragging the handles. Move it by clicking and dragging near the center of the image.
It is easier in this step to temporarily hide the 3D BAG data by clicking the icon in the top right and unchecking "3D BAG". You can also switch map layers there.
When you are happy, click Next step > to continue to STEP 3 of the Plan Configurator setup.
The result should look roughly like this:
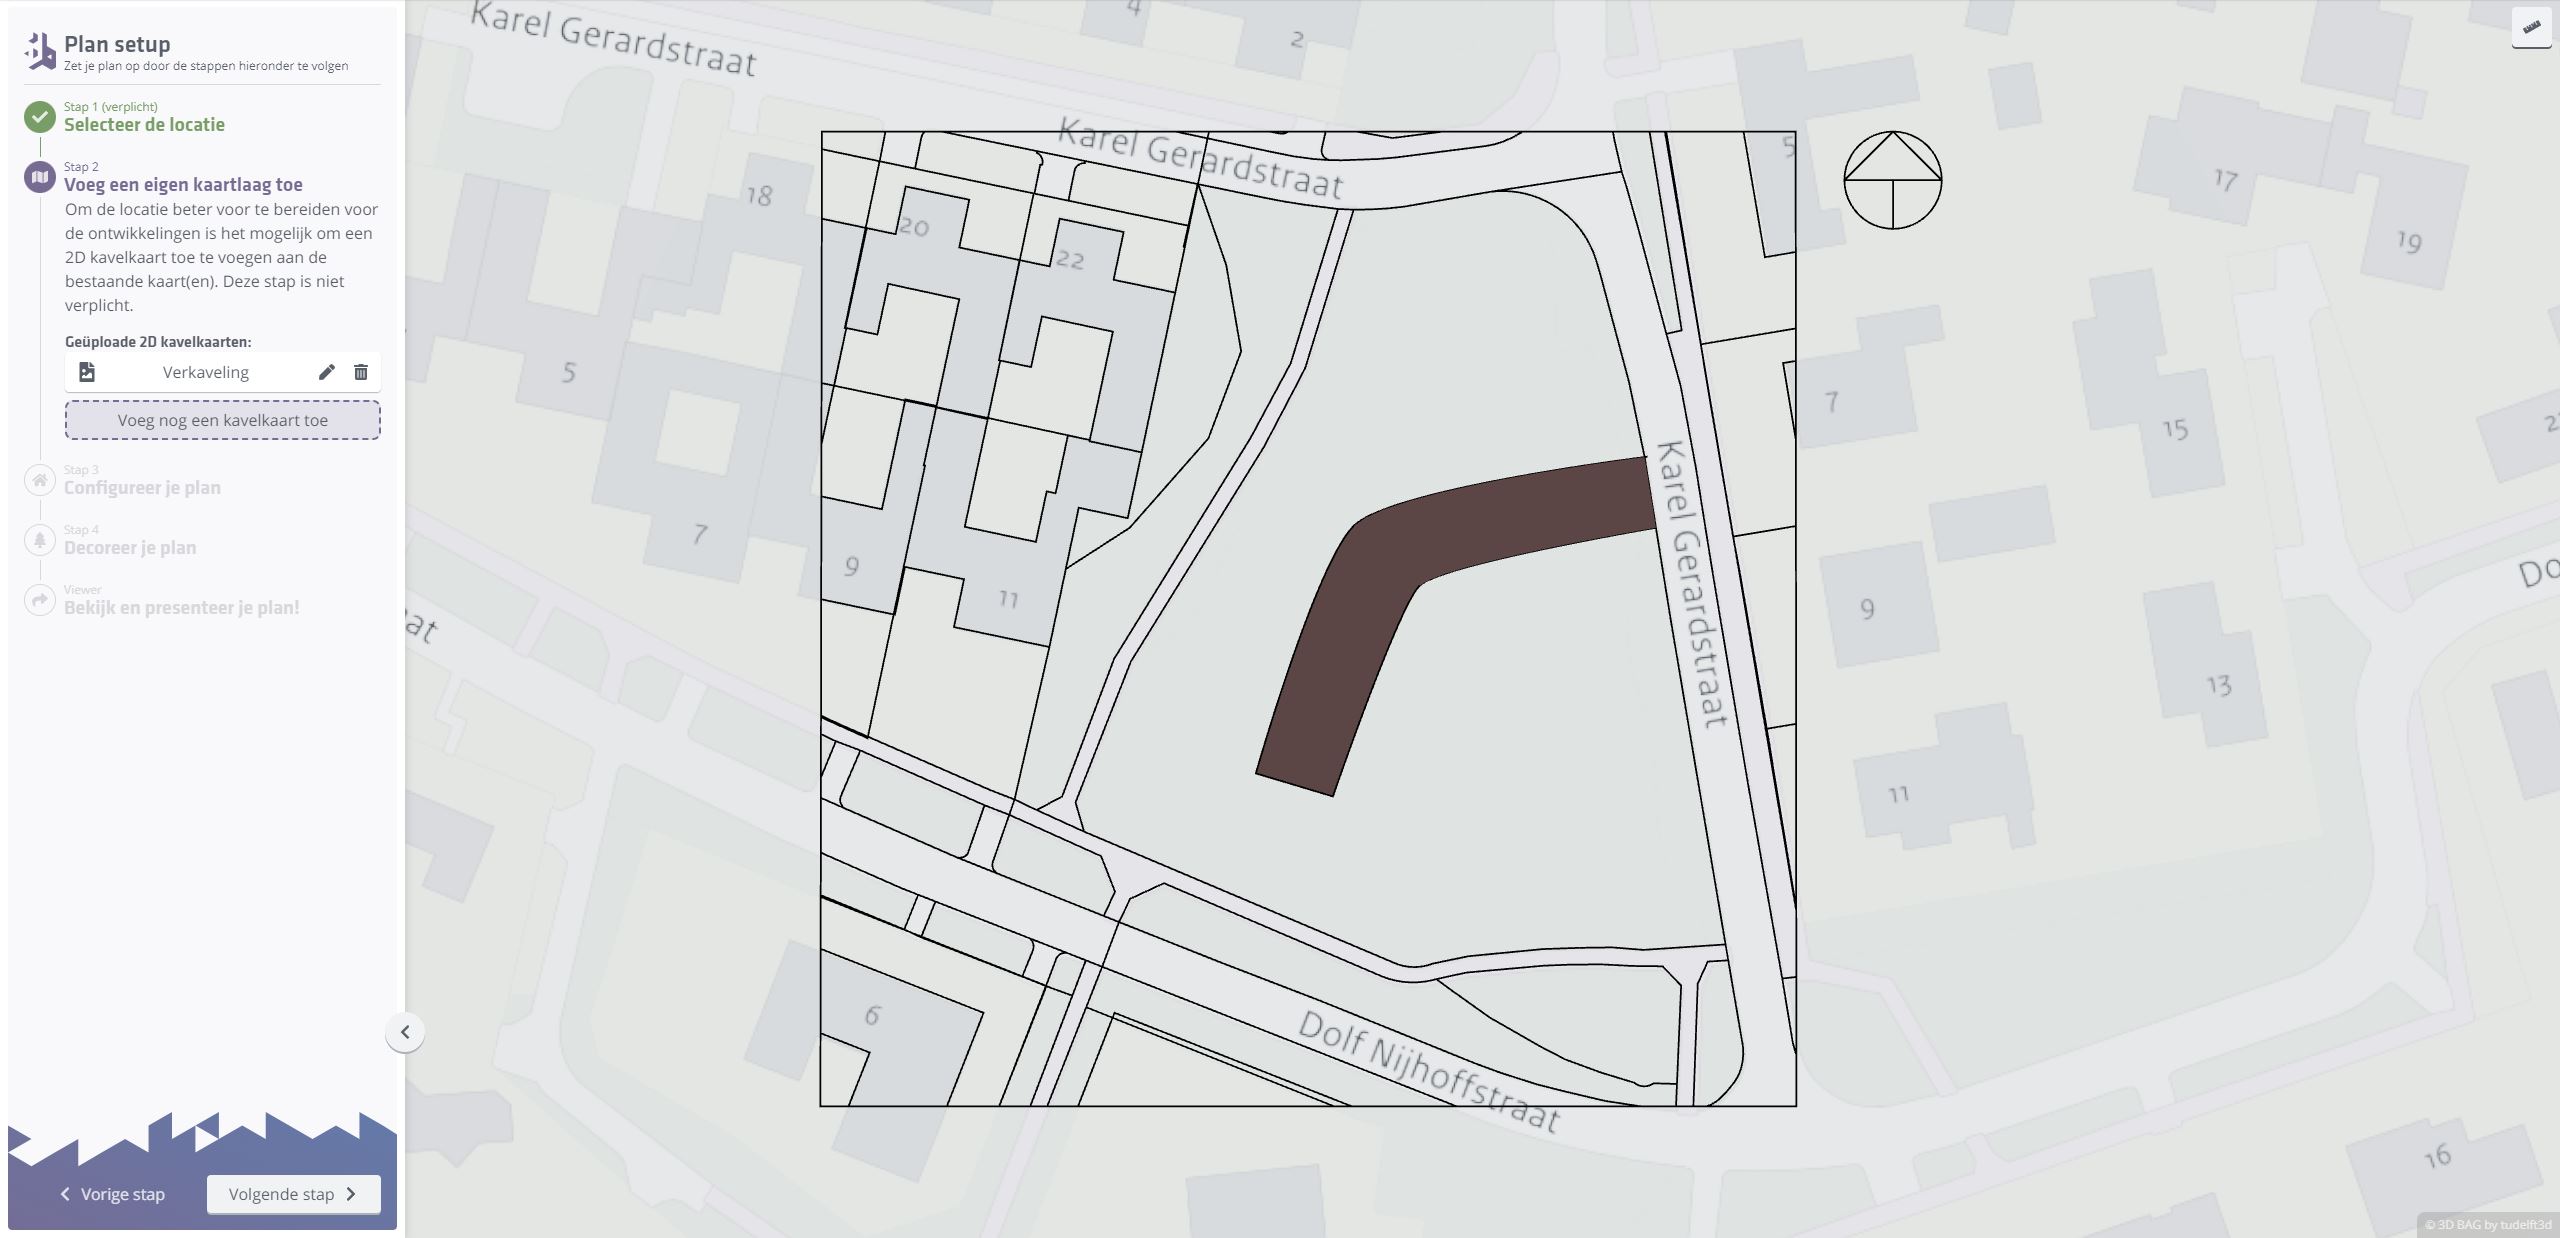
You can add multiple custom layers in this step!
Step 3 / Configure your plan
This is where most of the work happens. Here you place Models, Configurables, Home Types, and/or Mass Volumes. Before placing content it helps to get comfortable with the 3D controls.
-
Orbit: rotate around a point in the 3D environment by clicking and holding the LMB and dragging.
-
Pan: move around the 3D environment with the MMB (middle mouse button).
-
Zoom: use your mouse Scrollwheel.
-
Focus: after selecting an object, press F to focus the camera on it.
For the next step, remember to show the BAG data again via the icon and re-enable the BAG data.
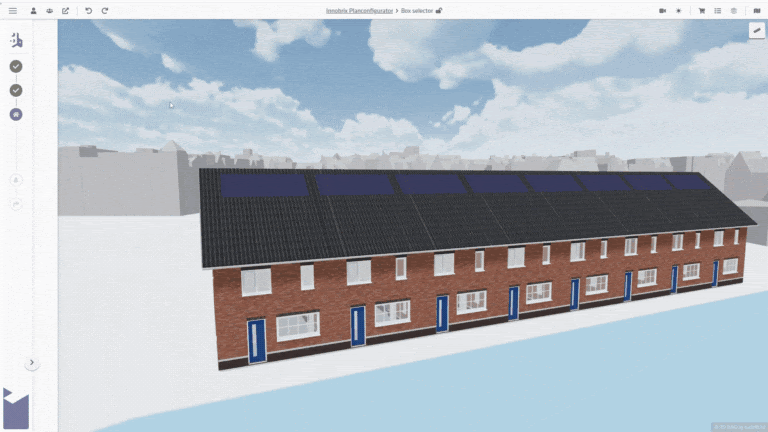
Placing Homes
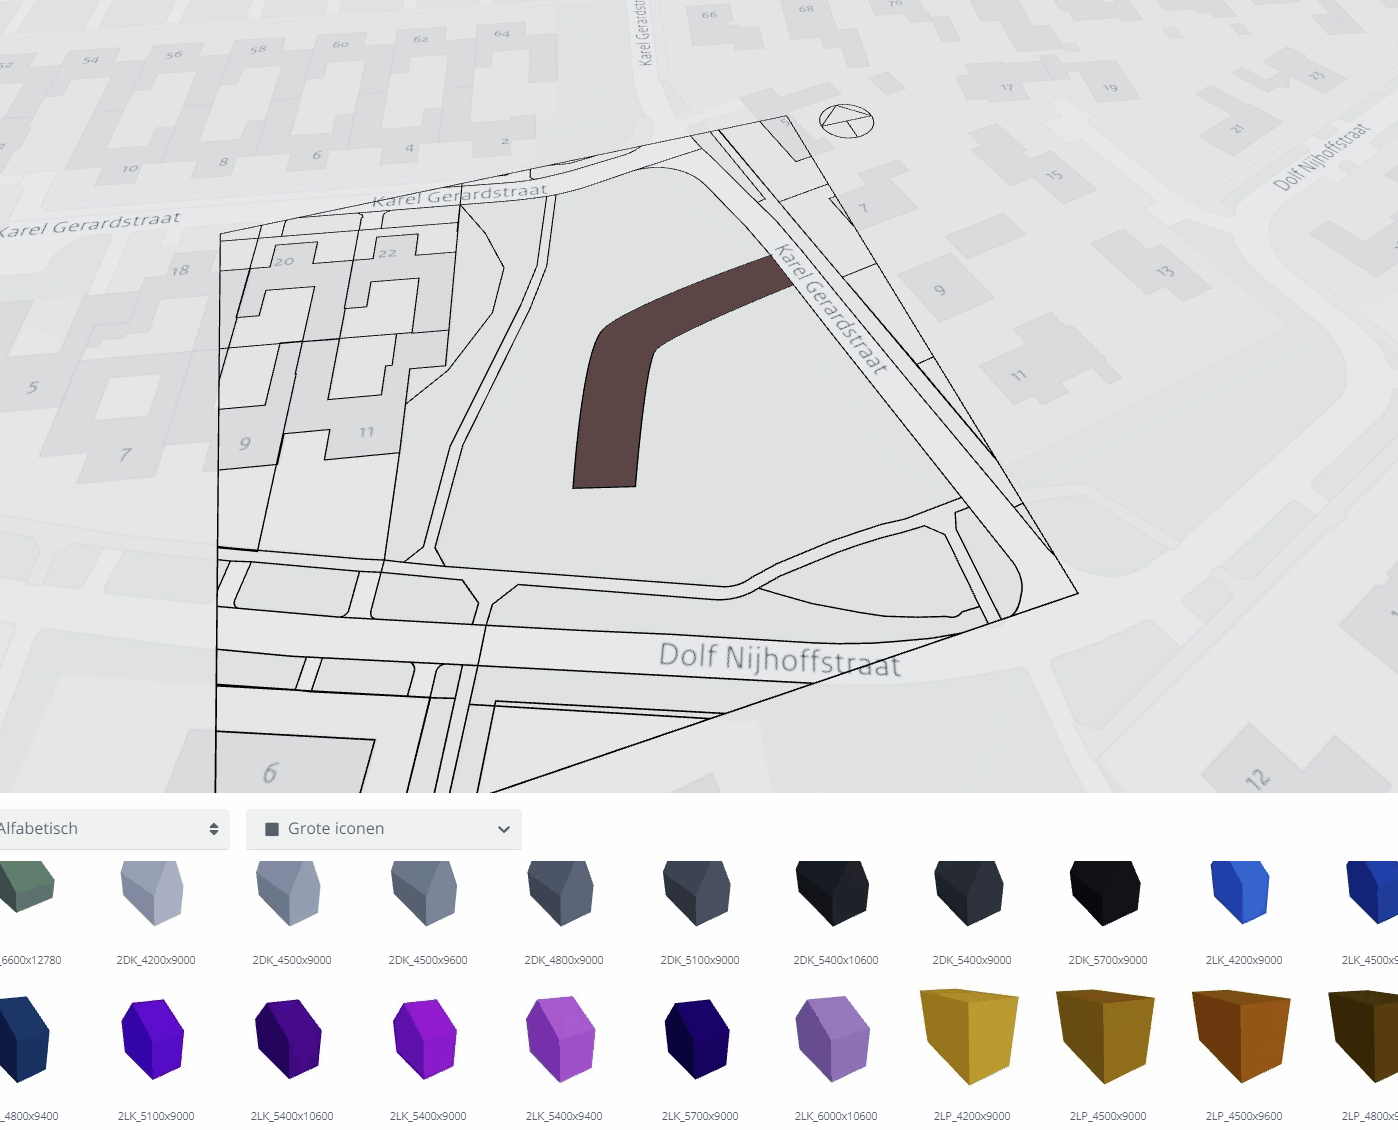
As mentioned earlier, we can now place Homes to visualize the plan. You can draw from four sources:
-
Mass Volumes (Masses with width x depth and roof shape)
-
Models (Models without options)
-
Configurables (Models with options)
-
Home Types (Models with options already set, or Home Types shared by other Innobrix users)
This content is available in the Content Browser.

As with many things in Innobrix, place content by dragging it from the Content Browser.
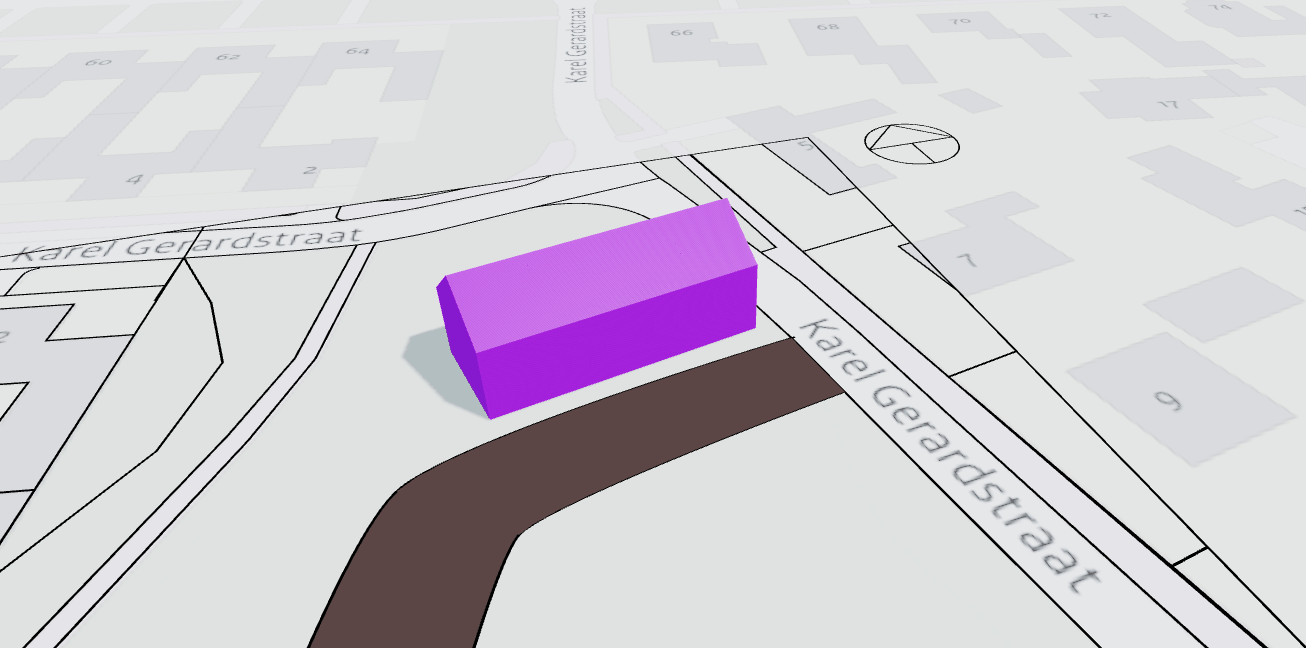
- Click
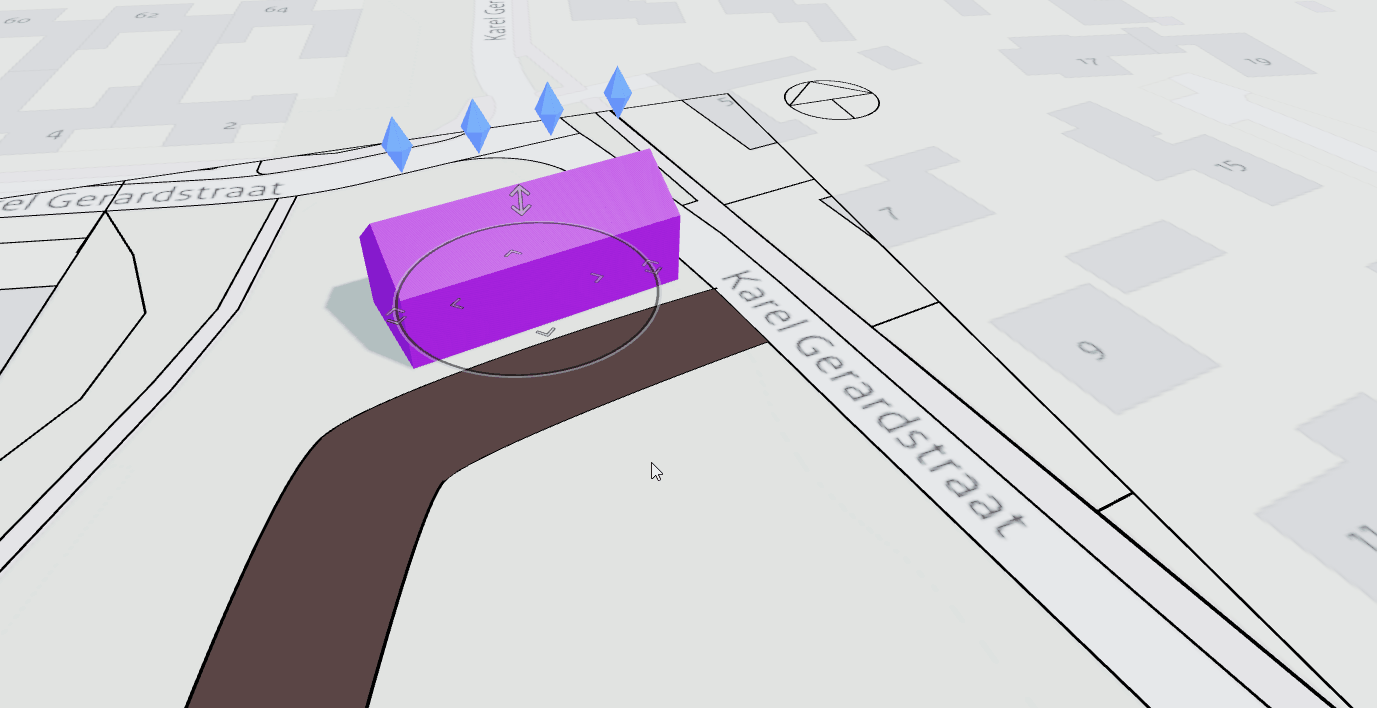
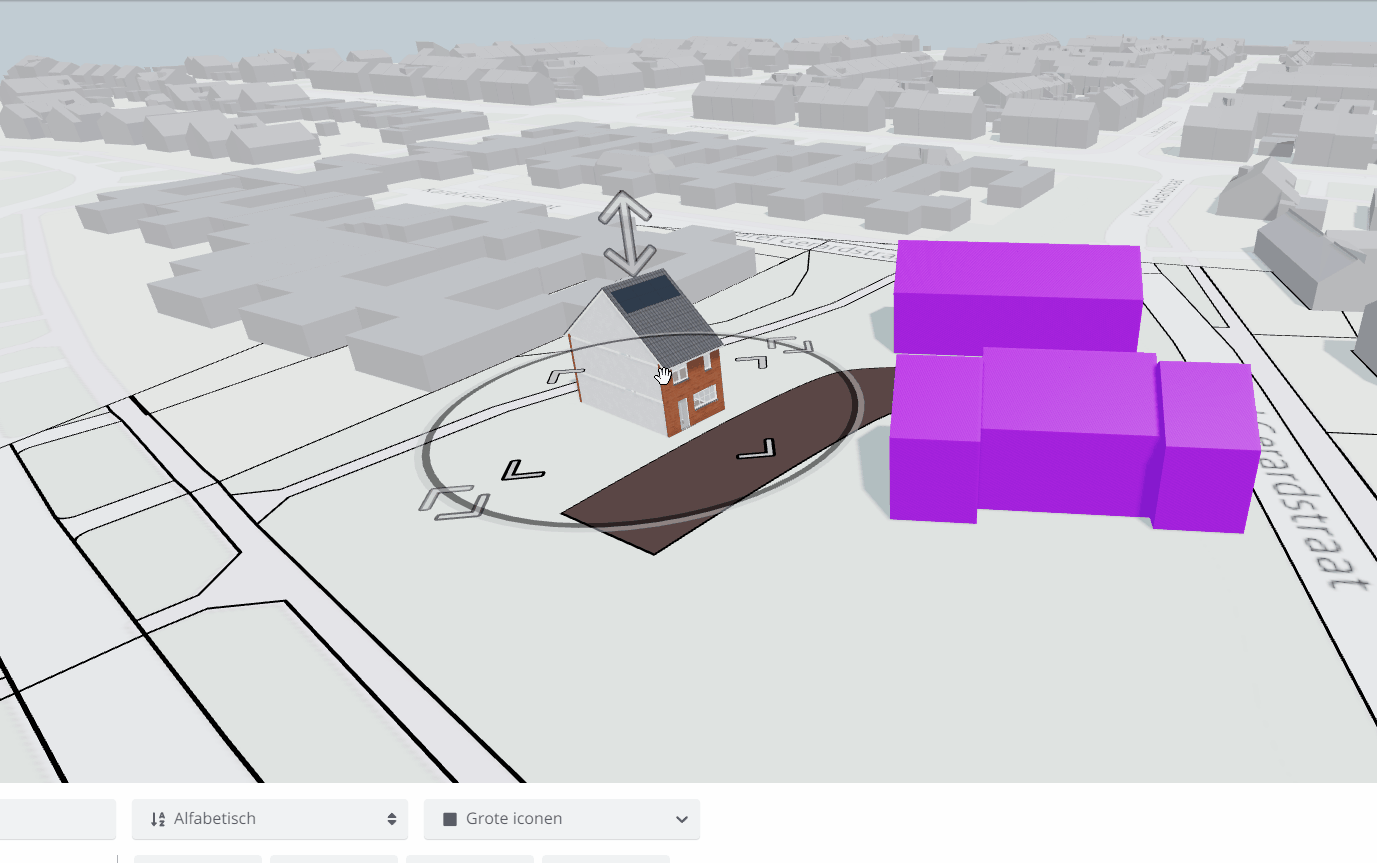
Mass Volumesand drag2LK_5400x9000onto the plot map. Roughly position it along the road.
You can rotate the object by dragging the outer ring of the gizmo.
Let's make a block of four mass volumes using the duplicate function via CTRL + D.

If you want to move the homes to another location, do you have to move them one by one? No. Innobrix lets you Group all kinds of objects. Do it in two simple steps:
-
Hold CTRL and click the desired objects.
-
Once multiple objects are selected, press CTRL + G to group them.
You can then treat the entire group as one entity: rotate, move, and duplicate it.
Another, often faster approach is using a Box Select. Hold CTRL and click-drag with the LMB to draw a box around the Homes you want to select. This lets you move, rotate, and configure multiple Homes at once.
-
Select the four Mass Volumes via Box Select or by clicking them one by one while holding CTRL.
-
Group them by pressing CTRL + G.
-
Duplicate the block with CTRL + D.
-
Position the block on the other side of the street.
-
Offset the two outer homes slightly to the rear to create variation.
Home settings
Your plan may use conceptual models. In the next step we will use models with options: Configurables.
If available, you can also use Home Types. Home Types are models ready for use. They can also come from other Innobrix users who shared their model(s) with you.
Go to the Configurables tab and click Innobrix Demo Library. Drag the Rijwoning into the scene and place it along the road.
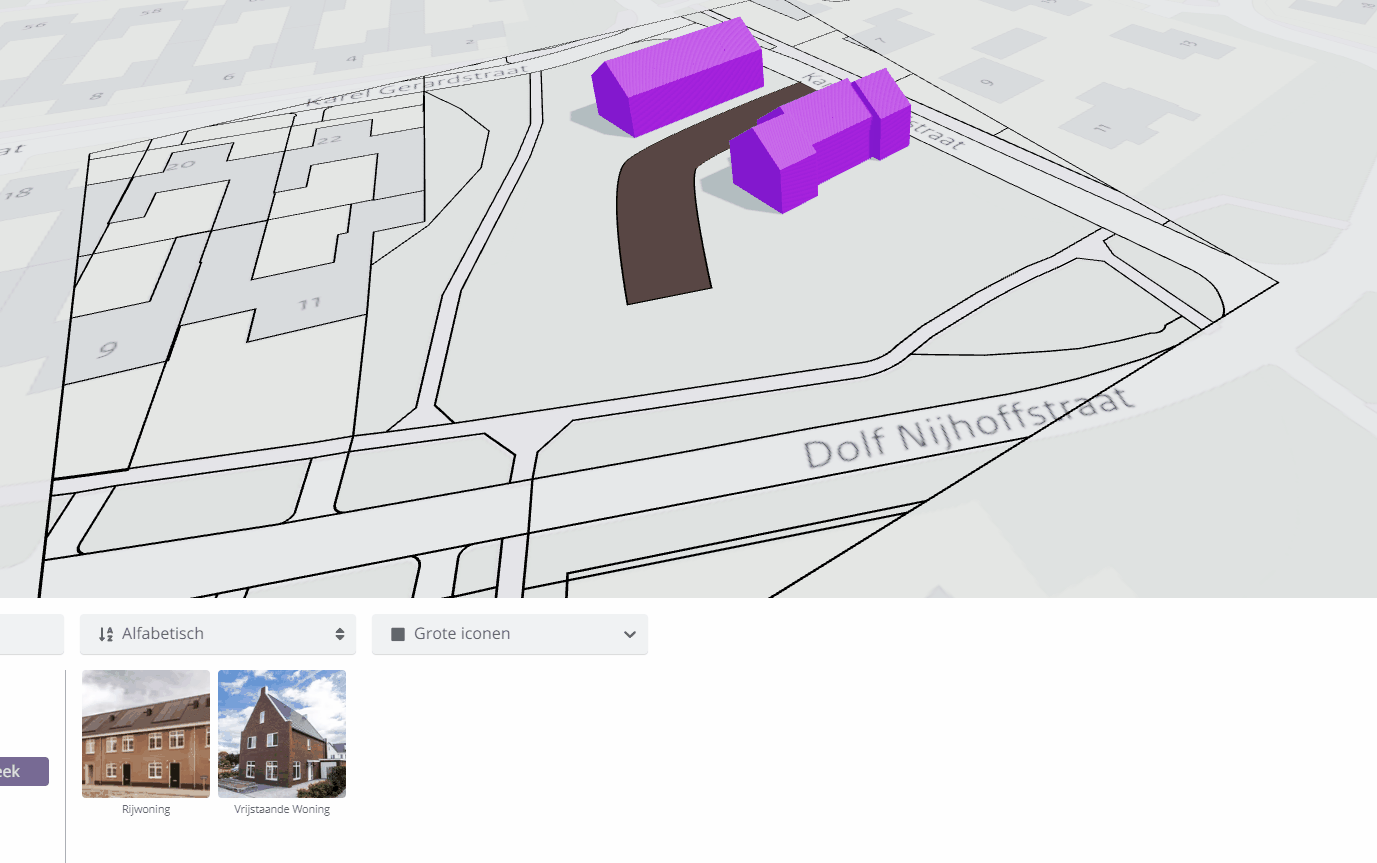
Duplicate the Rijwoning three times to create a block of four. Consider grouping them for convenience.
After placing the block we need to distinguish between the two mid-terrace homes and two corner homes. We do this using Functional Options available in the Default Option Set.
You can find the Default Option Set on the left when you select one or more Homes with options.
-
Select the left corner home in this block and click (Functional).
-
Click the option
Hoekwoning L.
Do the same for the right corner home using the option Hoekwoning R.
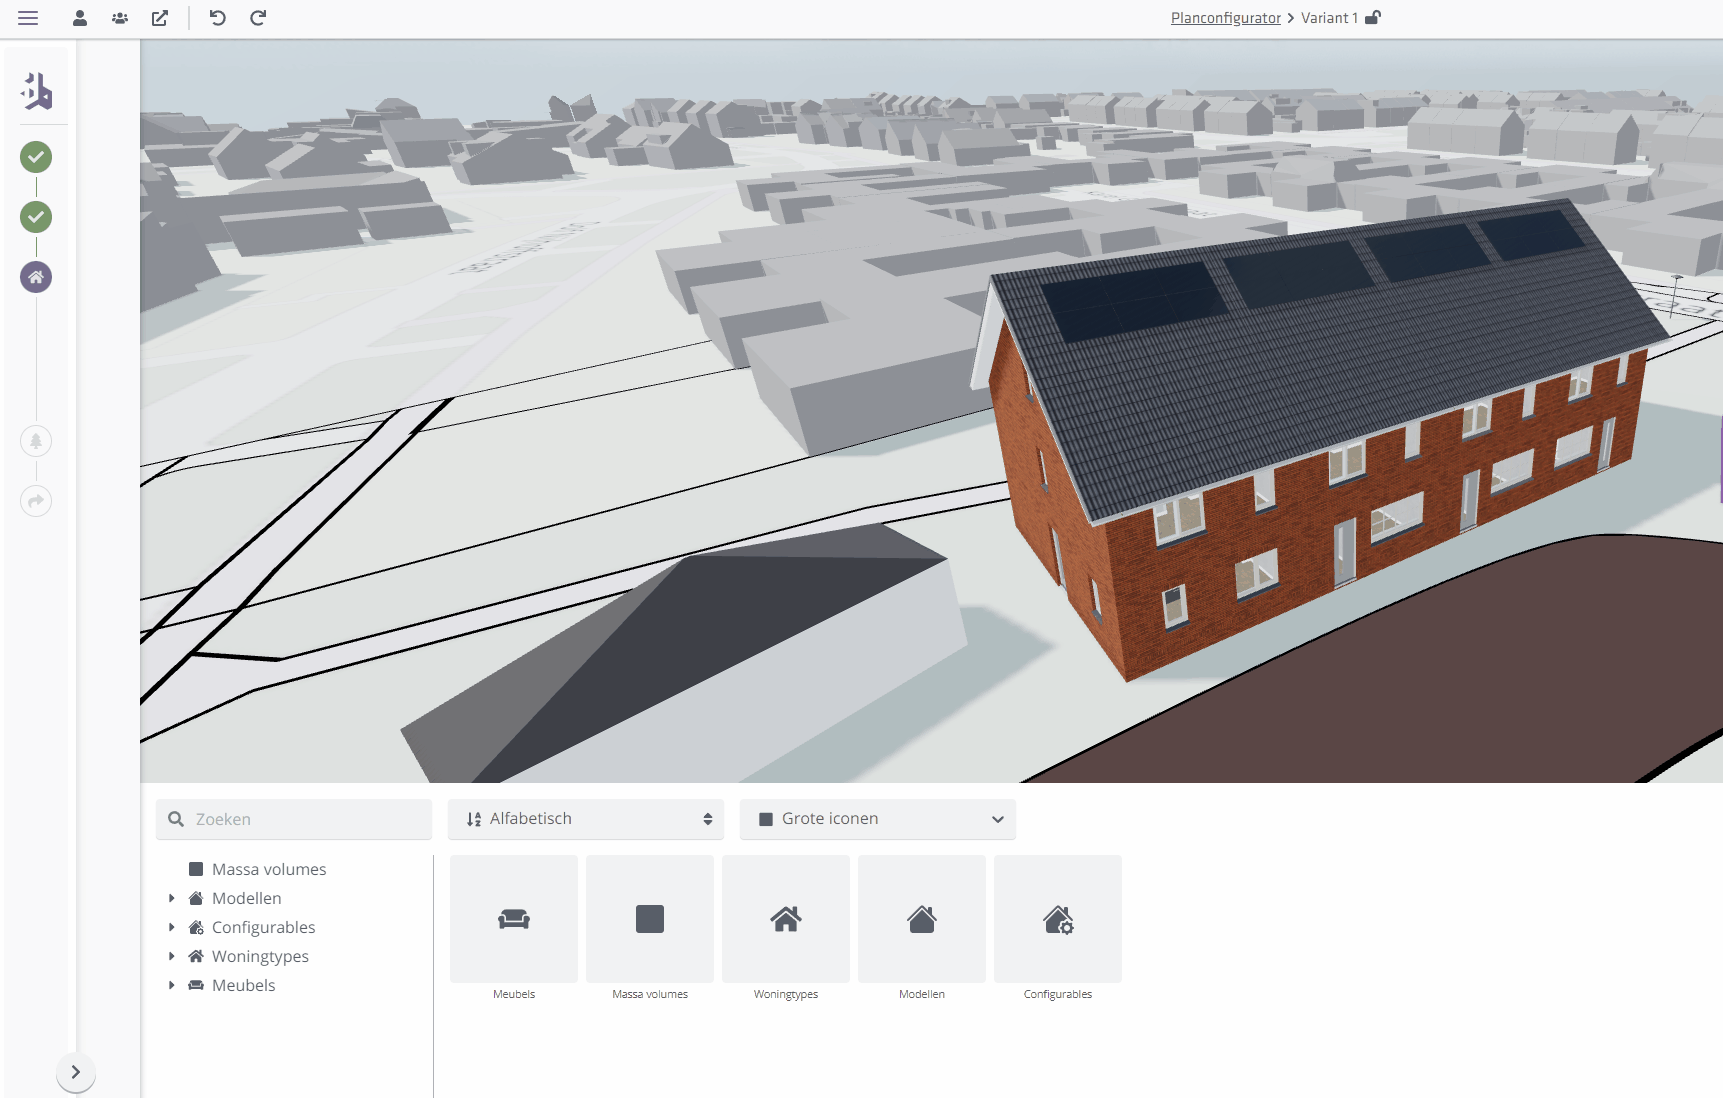
We now have a complete block configured for the Plan Configurator. Options are ready. We can also add a cost indication per home-there is a price difference between mid-terrace and corner homes. Each Home has properties you can edit via the icon. Price is one of those properties. Any active options are added to this amount.
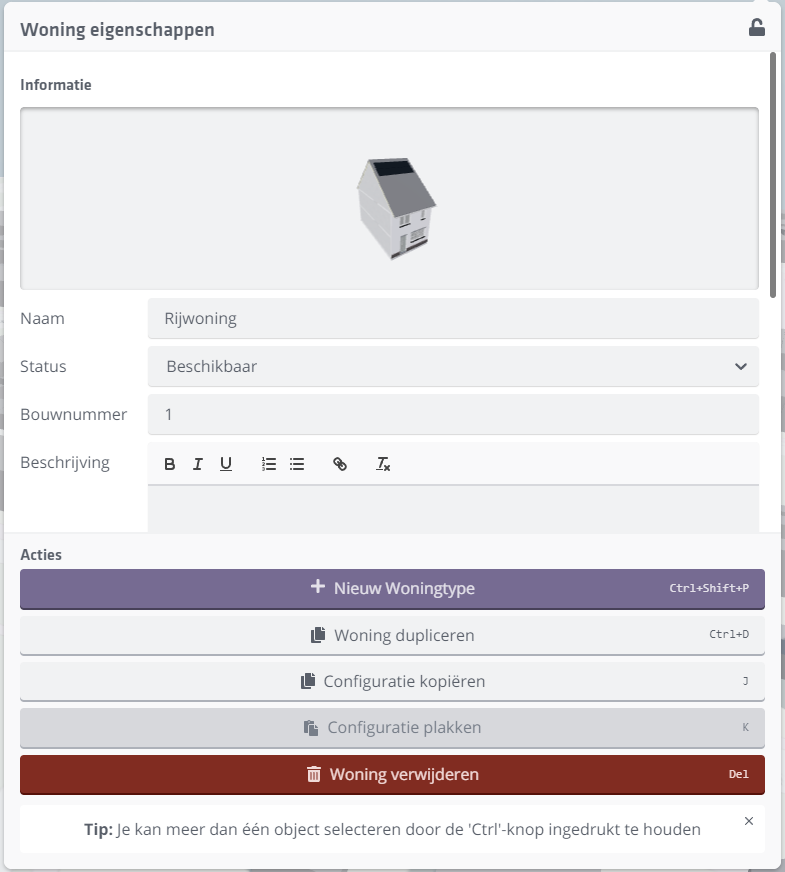
Adjust the price of the Homes.
-
Set all Mass Volumes to EUR 0
-
Rijwoning - L: EUR 250,000
-
Rijwoning - R: EUR 250,000
-
Rijwoning (the two mid-terrace homes): EUR 235,000
Plan costs and overview
Besides the prices per Home you can also add additional Plan costs, such as permit fees or preparing the land.
Add these costs in the plan overview, found under the icon. Click the numbers next to each type to select the corresponding Homes.
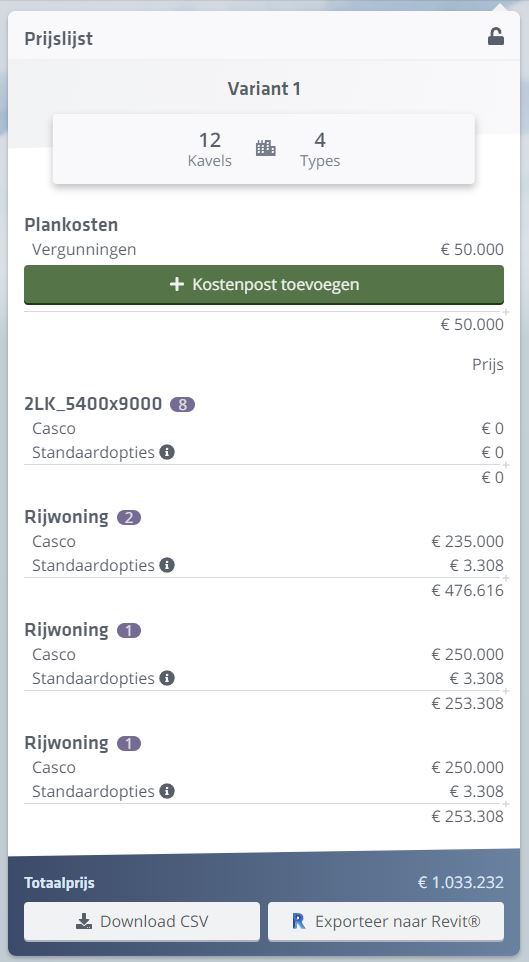
Add an additional cost item by clicking the icon and choosing + Add cost item.
For example, permits at around EUR 50,000.
From here most of the work is done to present and share your plan, but there is one step left.
Click Next Step > to proceed to Step 4.
Step 4 / Decorate your plan
This step is about giving the situation more context using the Decorations library. This library contains many decorative objects like streetlights, signs, cars, fencing, and more.
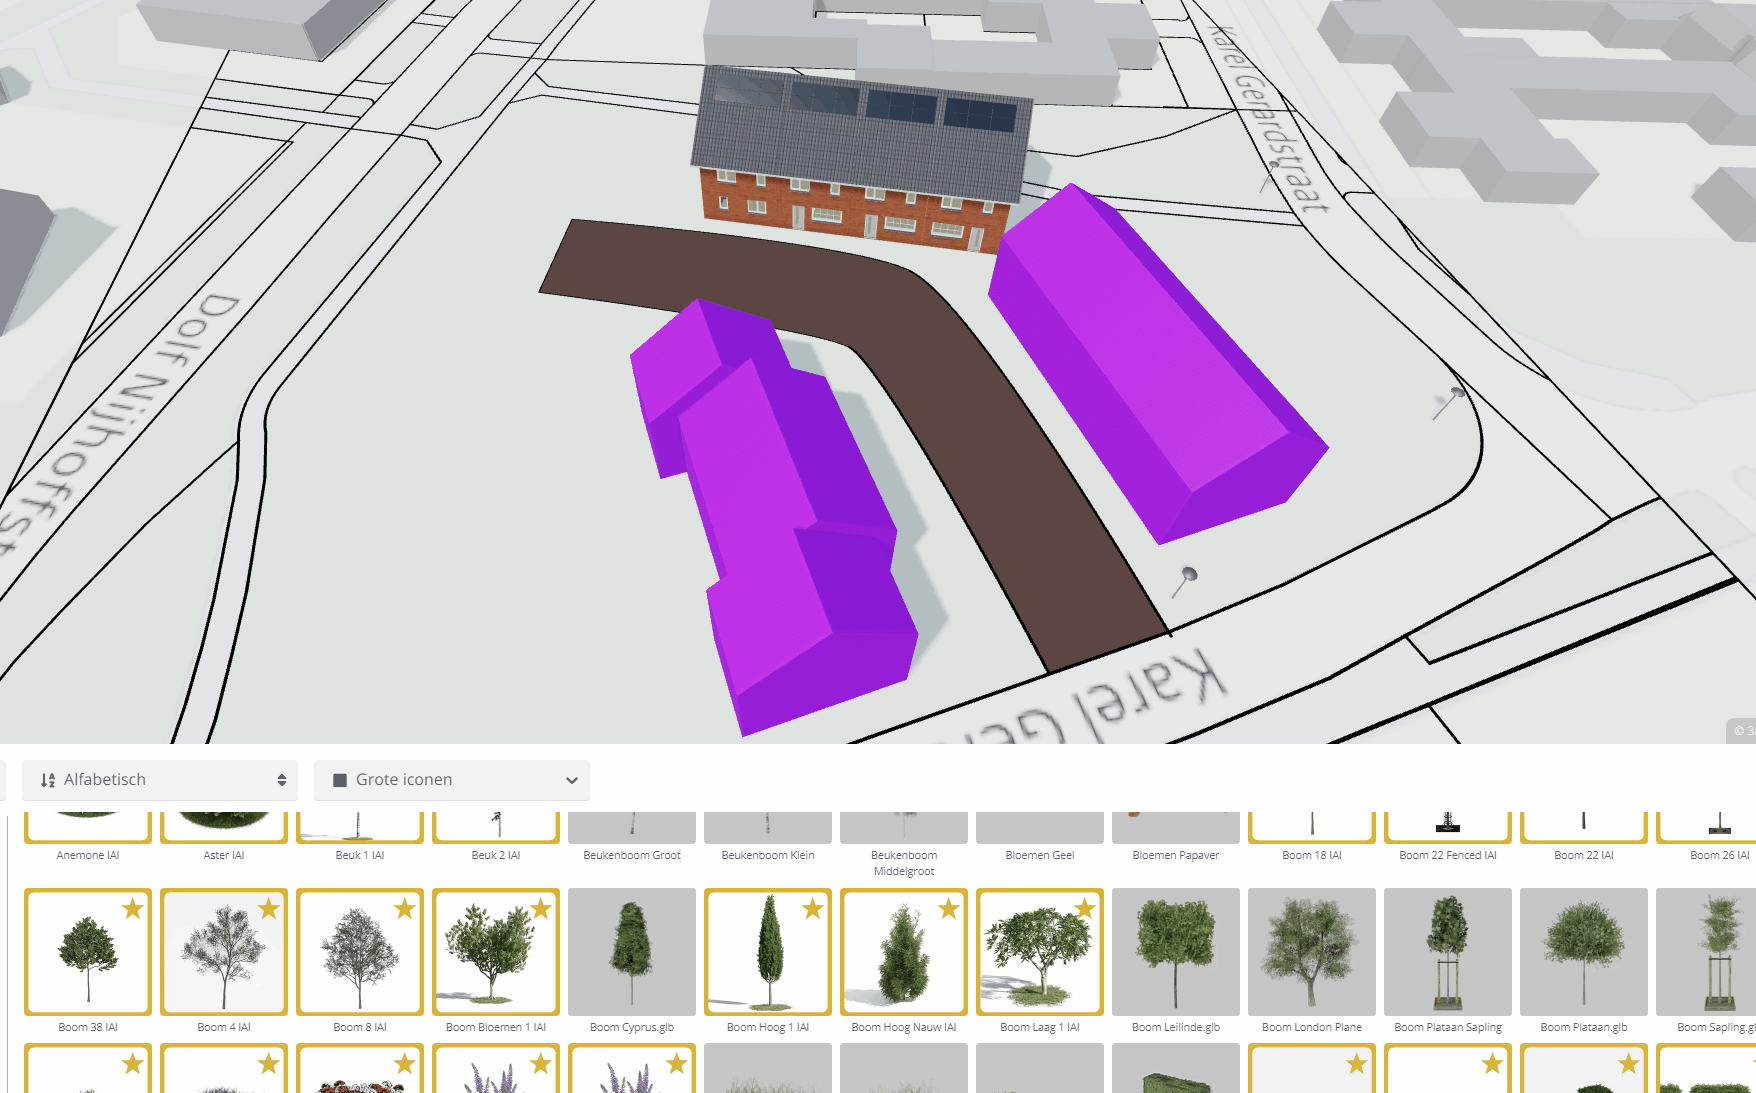
Alongside dragging and dropping decorations, most of the shortcuts you used earlier also work here, such as:
Grouping: CTRL + G
Duplicating: CTRL + D
Undo: CTRL + Z
Redo: CTRL + Y
Place some decorative elements to add context to the project.
Place some decorative elements to add context to the project.
Step 5 / View and present your plan
This step is more of a formality but lets you quickly share your plan. A newly created plan is private by default. The plan you just built may be private as well; you will see a warning if so. Private plans can only be viewed by people with an Innobrix account in your company.
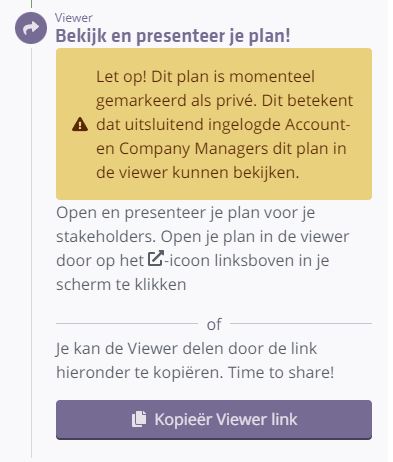
If you see this, go back to the Studio environment and make the plan public via the Public property.
If you have not already, make the project public via Innobrix Studio.
That concludes the step-by-step tutorial for the Plan Configurator!