Floors
Floors
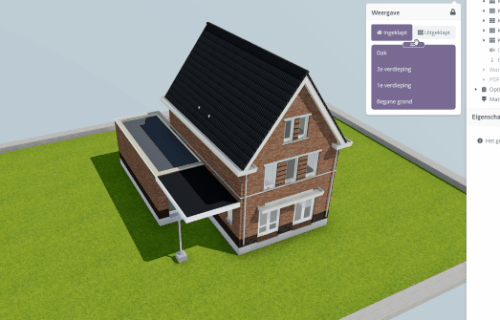
The Floor Switcher menu lets you view sections of the model. Which Floors appear depends on which floors are available and correctly configured.
Configuring floors
Here you see all available floors your model can use.
These originate primarily from Revit and allow the Floor Switcher to function correctly. The switcher controls the model's horizontal cut planes.
The Floor Switcher is based on the exported Revit levels marked as 'Building Story'. It is possible too many levels were exported. In that case, hide certain floors via the eye icon .
Hidden floors are not shown in the floor switcher.

If you choose "Ground Floor" (height 0) in the Floors menu, the clipping height is set to the height of the first visible floor above. The floor thickness of that upper floor is then subtracted.
That makes sense: if you used the ground floor height itself, you would see almost nothing.
Creating an extra floor
While the Revit levels are ideally correct, sometimes it is useful to have an extra floor�for example, when you do not have a (Building Story�marked) Revit level for the top of the home. One way to add it is via Revit and a model update.
A faster way is via the Floors context menu. You can create a new Floor and set its height and name. That is not possible for Revit-derived levels; their properties are static and read-only.